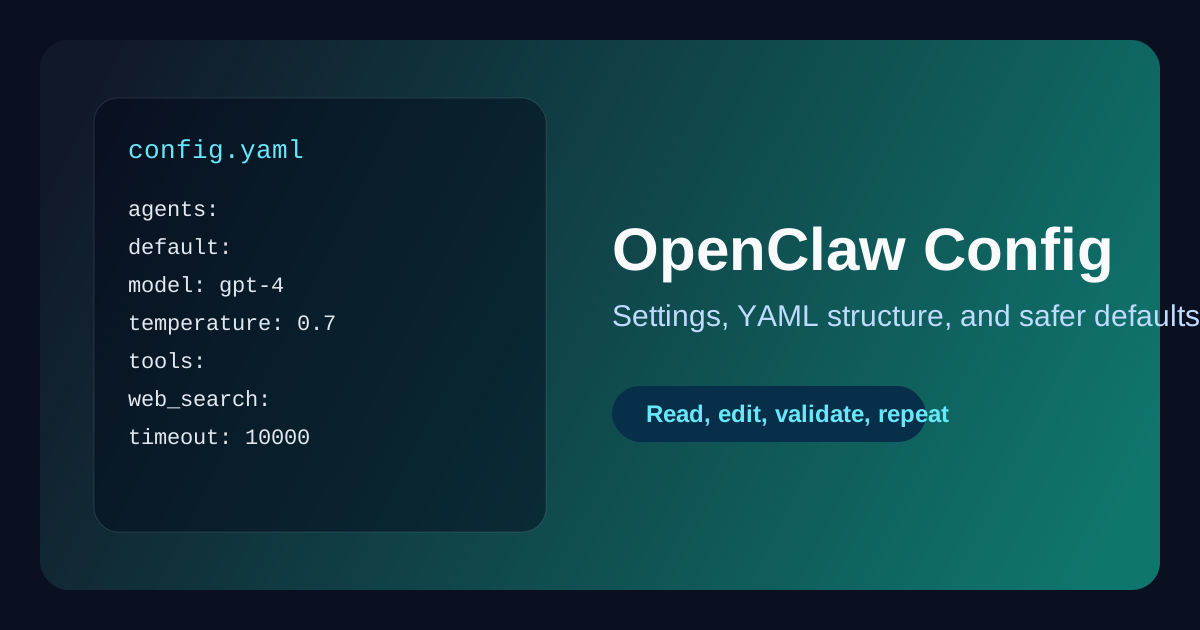
How to Run OpenClaw Locally: Quickstart & Local Development Guide
Complete guide to setting up and running OpenClaw locally on Windows, macOS, and Linux with hot reloading, mock services, Docker, and debugging tools.
Introduction & Why Run OpenClaw Locally
Developing autonomous AI agents requires a fast, predictable feedback loop. While cloud deployments and remote orchestration platforms have their place in production, running OpenClaw on your local machine is the cornerstone of effective agent engineering. Whether you are crafting specialized reasoning chains, writing custom tool plugins, or benchmarking memory retrieval strategies, a local development environment offers distinct advantages:
- Zero-Cost Iteration & Offline Testing: Running multi-step agent loops against live production infrastructure or remote API endpoints can quickly rack up substantial bills. A local environment coupled with mock services or local language models (via Ollama or vLLM) lets you execute thousands of automated unit and integration tests without spending a single token credit.
- Instant Hot-Reloading & Rapid Prototyping: Iterating on prompt templates, tool definitions, and task planning logic takes seconds rather than minutes when your local dev server automatically reloads code changes in real time.
- Frictionless Plugin & Tool Development: Writing custom integrations—such as local filesystem parsers, database adapters, or bespoke webhook listeners—requires direct access to your local runtime, environment variables, and network stack.
- Data Privacy & Key Isolation: Keeping sensitive customer mock data, staging credentials, and developer API keys strictly contained on your local workstation eliminates accidental leakage into public cloud logging buckets or shared dev registries.
If you are completely new to the framework, consider reviewing What is OpenClaw? The Complete Guide to the Open-Source AI Agent Framework to grasp the core agent architecture before diving into code.
In this comprehensive tutorial, we will take you step-by-step through configuring your local machine, establishing mock databases and caching tiers, running OpenClaw with hot-reload watchers, and configuring step-through debugging in Visual Studio Code.
System Prerequisites
OpenClaw is architected as a modern TypeScript/Node.js application with optional native C++ bindings for high-performance vector indexing and cryptographic session verification. Before installing dependencies, verify that your host operating system has the necessary runtime binaries and compilation toolchains installed.
Core Requirements Matrix
| Component | Minimum Version | Recommended Version | Verification Command |
|---|---|---|---|
| Node.js | v18.18.0 LTS |
v20.x or v22.x LTS |
node -v |
| Package Manager | npm v9.0+ |
pnpm v9.0+ or npm v10.x |
pnpm -v or npm -v |
| Git | v2.30.0 |
v2.40+ |
git --version |
| Docker Desktop / Engine | v24.0.0 |
v26.0+ with Compose v2 |
docker compose version |
| Python (for native builds) | 3.10+ |
3.11.x |
python3 --version |
OS-Specific Toolchains
Windows (WSL2 Recommended)
While OpenClaw can run natively in Windows PowerShell, running inside Windows Subsystem for Linux 2 (WSL2) with Ubuntu 22.04 or 24.04 LTS delivers superior file-watcher performance and native Unix socket compatibility:
# In Windows PowerShell (Administrator):
wsl --install -d Ubuntu-24.04

# Inside your WSL2 Ubuntu terminal:
sudo apt update && sudo apt install -y build-essential python3 make g++ git curl
curl -fsSL https://deb.nodesource.com/setup_20.x | sudo -E bash -
sudo apt install -y nodejs
If you must develop directly on native Windows without WSL, ensure you install the Visual Studio C++ Build Tools via npm install --global --production windows-build-tools or through the Visual Studio Community Installer (selecting the Desktop development with C++ workload).
macOS (Apple Silicon & Intel)
On macOS, install the Apple Command Line Tools and use Homebrew to install Node and Docker:
# Install Xcode Command Line Tools
xcode-select --install

# Install package manager and core tools via Homebrew
brew install git node@20 pnpm docker docker-compose
brew link node@20 --force --overwrite
Linux (Debian / Ubuntu / Fedora / Arch)
On standard Linux distributions, install the base development packages:
# Debian / Ubuntu:
sudo apt update && sudo apt install -y build-essential python3-dev pkg-config libssl-dev git curl
curl -fsSL https://deb.nodesource.com/setup_20.x | sudo -E bash -
sudo apt install -y nodejs

# Arch Linux:
sudo pacman -Syu base-devel git nodejs npm docker docker-compose
Step 1: Repository Cloning and Project Architecture
Start by cloning the official repository or your fork to your local workspace:
# Clone the repository
git clone https://github.com/openclaw/openclaw.git openclaw-local-dev
cd openclaw-local-dev

# Check out a stable release branch or develop branch
git checkout main
Exploring the Project Directory Layout
Understanding where different modules reside is essential when writing plugins or modifying core runtime behavior:
openclaw-local-dev/
├── config/                  # Default YAML and JSON configuration schemas
│   ├── default.yaml         # Base agent parameters
│   └── plugins.yaml         # Plugin discovery registry
├── docker/                  # Docker Compose and container definitions
│   ├── docker-compose.dev.yml
│   └── mock-server/         # Local API mock responder
├── scripts/                 # Development lifecycle and migration scripts
│   ├── dev-setup.sh
│   └── seed-mock-db.ts
├── src/                     # Application source code (TypeScript)
│   ├── agents/              # Built-in agent personas & execution graphs
│   ├── cli/                 # Terminal commands & interactive REPL
│   ├── core/                # Runtime engine, state machine, task scheduler
│   ├── memory/              # Vector stores, session caches, sqlite adapters
│   ├── plugins/             # Extensible tool hook definitions
│   └── tools/               # Standard toolkits (web, file, bash, sql)
├── tests/                   # Unit, integration, and E2E test suites
│   ├── unit/
│   └── integration/
├── .env.example             # Template for local environment variables
├── package.json             # NPM dependencies, scripts, and build targets
└── tsconfig.json            # TypeScript compiler configuration
For a thorough breakdown of how individual commands manipulate these submodules from your terminal, refer to the OpenClaw CLI Guide: Commands, Flags, and Workflows.
Step 2: Environment Configuration
OpenClaw isolates sensitive configuration parameters—such as API keys, database credentials, mock service flags, and runtime logging levels—using standard .env hierarchy.
Creating .env.local
Copy the default environment template to .env.local (which is automatically ignored by Git):
cp .env.example .env.local
Open .env.local in your editor and configure the parameters according to your local development goals:
# ==============================================================================
# OpenClaw Local Development Environment Settings
# ==============================================================================

# Runtime Environment
NODE_ENV=development
OPENCLAW_ENV=local
LOG_LEVEL=debug
LOG_FORMAT=pretty

# Local Server & API Gateway
PORT=3000
HOST=127.0.0.1
API_PREFIX=/api/v1
CORS_ORIGINS=http://localhost:3000,http://127.0.0.1:3000

# LLM Provider Configuration
# Set to 'mock' or 'ollama' for 100% offline local development:
LLM_DEFAULT_PROVIDER=openai
OPENAI_API_KEY=sk-local-dev-mock-or-real-key
OPENAI_API_BASE_URL=https://api.openai.com/v1

# Local Ollama Configuration (Optional offline fallback)
OLLAMA_BASE_URL=http://localhost:11434
OLLAMA_MODEL=llama3:8b-instruct-q4_K_M

# Local Database & Cache Endpoints (Managed via Docker Compose)
DATABASE_URL=postgresql://openclaw_dev:[email protected]:5432/openclaw_local
REDIS_URL=redis://127.0.0.1:6379/0

# Vector Memory & Embeddings Storage
EMBEDDING_PROVIDER=local-fastembed
VECTOR_STORE_TYPE=pgvector
LOCAL_STORAGE_PATH=./.openclaw_data

# Mock Service Flags
MOCK_EXTERNAL_TOOLS=true
ENABLE_PROMPT_TRACING=true
To dive deeper into every available YAML and environment flag, check out the OpenClaw Configuration Guide.
Step 3: Dependency Installation & Local Builds
OpenClaw supports both npm and pnpm. We strongly recommend pnpm for faster dependency symlinking, reduced disk footprint, and strict peer dependency validation.
Installing Dependencies
Run the package installer from your project root:
# Recommended: Using pnpm
pnpm install

# Alternative: Using standard npm
npm install
Resolving Native Compilation & Postinstall Scripts
During installation, OpenClaw compiles optional native C++ add-ons (such as better-sqlite3 and hnswlib-node for local vector clustering). If you encounter postinstall compilation errors:
- Python Missing Error (
node-gyp rebuildfailure): Ensurepython3is available in your PATH:npm config set python python3 - Missing C++ Compiler / GLIBC version:
On Ubuntu/Debian, execute
sudo apt install -y build-essential libssl-dev. - Sharp / Prebuilt Architecture Mismatch (e.g. Apple Silicon M-series):
Clear local node_modules and force rebuild:
rm -rf node_modules pnpm-lock.yaml package-lock.json
pnpm install --force
Running the Initial TypeScript Build
Validate that the TypeScript compiler processes the codebase without type errors:
# Run incremental TypeScript build
pnpm run build

# Or verify type signatures without emitting JS output
pnpm run typecheck
Step 4: Starting the Local Development Server
Once your build passes, start OpenClaw in watch mode. OpenClaw uses tsx watch (or nodemon with ts-node) to provide near-instantaneous hot reloading whenever source files in src/ are modified.
Launching Development Mode
# Start the full API server and agent runtime with hot reloading
pnpm run dev
You should see startup logs similar to the following:
[11:42:00.120] INFO (core): OpenClaw Core Runtime v2.4.0-dev initializing...
[11:42:00.125] DEBUG (config): Loaded environment overrides from .env.local
[11:42:00.150] INFO (memory): Connected to local vector storage at 127.0.0.1:5432/openclaw_local
[11:42:00.180] INFO (plugins): Discovered 14 local tool plugins in src/plugins/
[11:42:00.210] INFO (server): HTTP Gateway listening on http://127.0.0.1:3000
[11:42:00.212] INFO (watcher): File watcher active. Monitoring src/**/*.{ts,json,yaml} for changes.
Interactive CLI Mode for Rapid Agent Testing
If you prefer testing agent prompts and tools interactively from your terminal without opening a browser or REST client, launch the interactive REPL:
pnpm run dev:cli -- --agent default --verbose
This starts an interactive prompt session where you can dispatch tasks directly:
openclaw> Plan and summarize the latest updates from local file ./README.md
[Agent:default] Reasoning step 1: Reading file contents...
[Tool:fs_read] Path: ./README.md (Bytes: 4210)
[Agent:default] Reasoning step 2: Synthesizing summary...
Done in 1.42s.
Step 5: Setting Up Local Mock Services & Local Database
A production-grade agent relies on persistent state, vector embeddings, and background task queues. To replicate these services locally without complex manual installs, OpenClaw includes a modular Docker Compose development manifest.
Starting Local Services via Docker Compose
In the docker/ directory, inspect docker-compose.dev.yml:
version: '3.8'

services:
  postgres:
    image: pgvector/pgvector:pg16
    container_name: openclaw-dev-postgres
    environment:
      POSTGRES_USER: openclaw_dev
      POSTGRES_PASSWORD: openclaw_pass
      POSTGRES_DB: openclaw_local
    ports:
      - "5432:5432"
    volumes:
      - openclaw_pgdata:/var/lib/postgresql/data
    healthcheck:
      test: ["CMD-SHELL", "pg_isready -U openclaw_dev -d openclaw_local"]
      interval: 5s
      timeout: 5s
      retries: 5

  redis:
    image: redis:7-alpine
    container_name: openclaw-dev-redis
    ports:
      - "6379:6379"
    volumes:
      - openclaw_redisdata:/data

  mock-llm:
    image: wiremock/wiremock:3.5-alpine
    container_name: openclaw-dev-mock-llm
    ports:
      - "8080:8080"
    volumes:
      - ./mock-server/__files:/home/wiremock/__files
      - ./mock-server/mappings:/home/wiremock/mappings

volumes:
  openclaw_pgdata:
  openclaw_redisdata:
Spin up all supporting containers in detached mode:
docker compose -f docker/docker-compose.dev.yml up -d
Verify that all three services are running healthy:
docker compose -f docker/docker-compose.dev.yml ps
Seeding Mock Schemas & Test Fixtures
Run the database migration and seeding utility:
pnpm run db:migrate:dev
pnpm run db:seed:mock
For full details on containerized deployment patterns and production container builds, refer to the OpenClaw Docker Setup & Installation Guide.
Step 6: Testing & Debugging Local Workflows
Debugging complex agent reasoning loops requires more than just console.log. OpenClaw provides first-class support for IDE-based step-debugging, memory snapshots, and automated test runners.
Configuring Visual Studio Code Debugger
Create or update .vscode/launch.json in your workspace root to enable single-click breakpoint debugging:
{
  "version": "0.2.0",
  "configurations": [
    {
      "type": "node",
      "request": "launch",
      "name": "Debug OpenClaw Server",
      "runtimeExecutable": "pnpm",
      "runtimeArgs": ["run", "dev"],
      "restart": true,
      "console": "integratedTerminal",
      "internalConsoleOptions": "neverOpen",
      "skipFiles": ["<node_internals>/**", "**/node_modules/**"],
      "envFile": "${workspaceFolder}/.env.local"
    },
    {
      "type": "node",
      "request": "launch",
      "name": "Debug Specific Agent Task",
      "program": "${workspaceFolder}/src/cli/index.ts",
      "args": ["run", "--agent", "default", "--prompt", "Analyze system health"],
      "console": "integratedTerminal",
      "envFile": "${workspaceFolder}/.env.local",
      "skipFiles": ["<node_internals>/**"]
    }
  ]
}
Now you can place breakpoints inside src/core/planner.ts or src/tools/webSearch.ts, press F5 in VS Code, and inspect agent memory, variable scopes, and tool payloads interactively.
Chrome DevTools Node Inspector
If you prefer debugging via Chrome DevTools or Chromium-based browsers:
# Start Node runtime with the inspector listening on port 9229
node --inspect-brk -r ts-node/register src/server.ts
Open Google Chrome, navigate to chrome://inspect, click Configure... to ensure localhost:9229 is added, and select Inspect on the target OpenClaw process.
Running the Automated Test Suite
OpenClaw utilizes Jest / Vitest for rapid regression testing. Run individual test groups before committing code:
# Run all unit tests
pnpm test:unit

# Run tool plugin integration tests against your local Docker services
pnpm test:integration

# Run tests in watch mode while refactoring
pnpm test -- --watch
Step 7: Transitioning from Local to Production
Once your agent workflow, tools, and prompts perform reliably on your local machine, transitioning to a remote staging or production host is straightforward.
Checklist for Production Readiness
- Environment Segregation: Ensure
.env.localremains strictly on your local machine. In production, configure environment variables via your secrets manager or cloud dashboard. - Persistent Storage & Remote Databases: Transition from local Docker containers to dedicated cloud infrastructure. For reliable high-performance cloud hosting with NVMe storage and low-latency network interconnects, deploy on Vultr Cloud Compute.
- Containerized Production Build: Build an optimized, non-root production Docker image using multistage builds:
docker build -t openclaw:latest -f docker/Dockerfile.prod . - Process Supervision & Clustering: On dedicated VPS servers, manage process lifecycles and automatic restarts using PM2 or systemd:
pm2 start dist/server.js --name "openclaw-production" --instances max
For detailed guidance on server sizing, Linux kernel tuning, and security hardening, consult our dedicated guide on Best VPS for OpenClaw Self-Hosting.
Frequently Asked Questions (FAQ)
1. Can I run OpenClaw locally without Docker?
Yes. Docker is strictly required only if you want the automated convenience of local PostgreSQL, pgvector, and Redis containers. If you prefer running without Docker, OpenClaw includes an in-memory SQLite store (VECTOR_STORE_TYPE=sqlite-local) and an in-process LRU cache for lightweight development. Simply update VECTOR_STORE_TYPE=sqlite in .env.local.
2. Why is hot reloading slow on Windows with WSL2?
If you experience high CPU usage or 5-10 second delays before file changes trigger a reload in WSL2, ensure your cloned repository is stored inside the Linux root filesystem (e.g., /home/username/openclaw-local-dev) rather than on a Windows mount (e.g., /mnt/c/Users/...). Cross-OS boundary filesystem notifications in WSL2 are significantly slower.
3. How do I switch from OpenAI to a completely local LLM like Ollama?
In your .env.local, set LLM_DEFAULT_PROVIDER=ollama and OLLAMA_BASE_URL=http://localhost:11434. Ensure Ollama is running (ollama serve) and that you have pulled your target model (ollama run llama3:8b-instruct). OpenClaw will route all reasoning prompts to your local GPU or CPU inference engine without external API calls.
4. How do I fix "Port 3000 already in use" errors?
If another service or a previous zombie instance of OpenClaw is holding port 3000, you can either specify a different port in .env.local (PORT=3001) or terminate the conflicting process:
# On Linux / macOS:
lsof -i :3000
kill -9 <PID>

# On Windows (PowerShell):
Get-Process -Id (Get-NetTCPConnection -LocalPort 3000).OwningProcess | Stop-Process -Force
5. What is the difference between pnpm run dev and pnpm run dev:cli?
pnpm run dev boots the full REST and WebSocket API server (typically used when building front-end dashboards, webhook endpoints, or external integrations), whereas pnpm run dev:cli launches an interactive terminal REPL for testing prompts and agent decision graphs directly from your command line.
Summary & Next Steps
Running OpenClaw locally provides a fast, cost-free, and private environment to build, refine, and stress-test autonomous AI agent systems. By mastering local environment configuration, Docker-based mock services, and VS Code step-debugging, you can develop robust agents with confidence before deploying to high-availability production clusters.
To continue expanding your OpenClaw expertise, explore these related resources:
OpenClaw Security & Deployment Brief
Get the weekly OpenClaw Security & Deployment Brief — malicious skill alerts, CVE breakdowns, cost optimization tips.